Resin Tables: Building the Mold
On to the next step of my passion project - building the mold!
It's late March at this point in the project, and I've got a mold up and ready to go. The mold again took reference from Cam of BlackTailStudios on the process for doing this. I'll give a quick summary, but feel free to check out Cam's blog for more in depth details: https://www.blacktailstudio.com/blog/how-to-make-an-epoxy-resin-mold
The mold needs to cover 3 core objectives:
- Provide the overall shape that encase everything that the resin table top will be.
- Must be leak-proof.
- Easy enough to release the table once the resin has hardened through the curing process.
To summarize some key points of Cam's blog for the sizing of the mold:
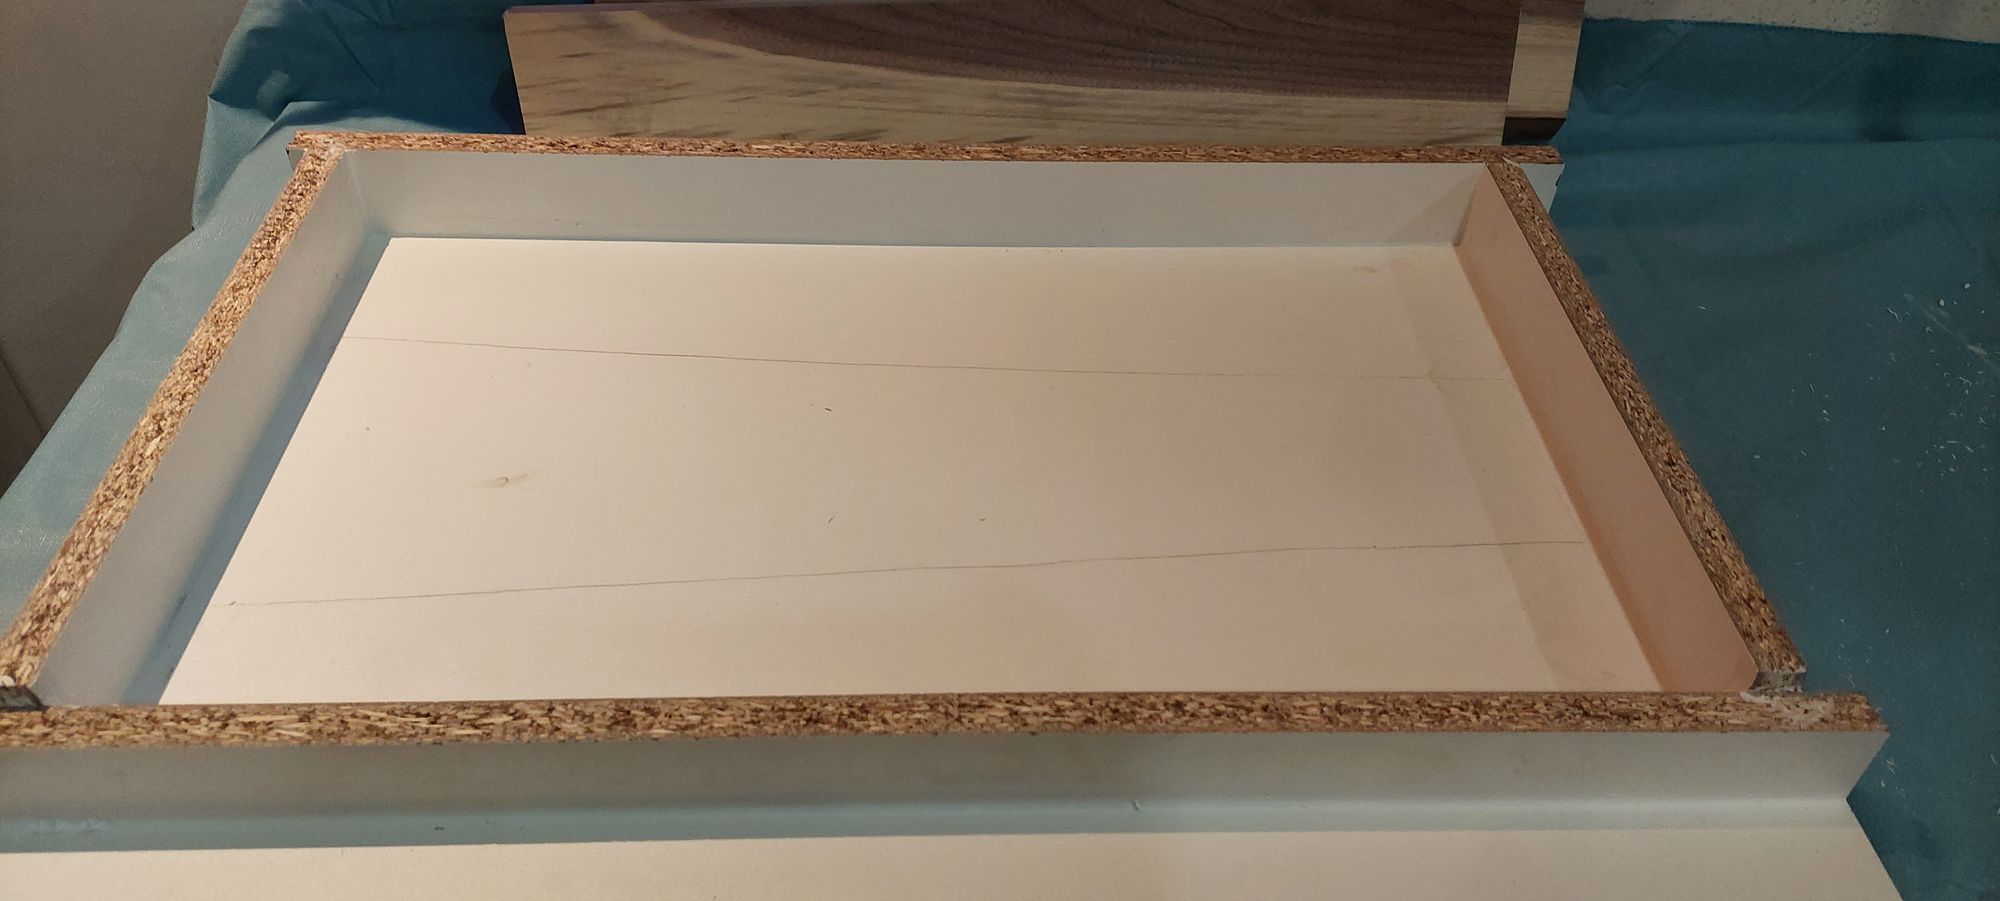
- 3/4 inch thick Melamine board.
- Sides minimum 1 inch taller than the height/thickness of your table top.
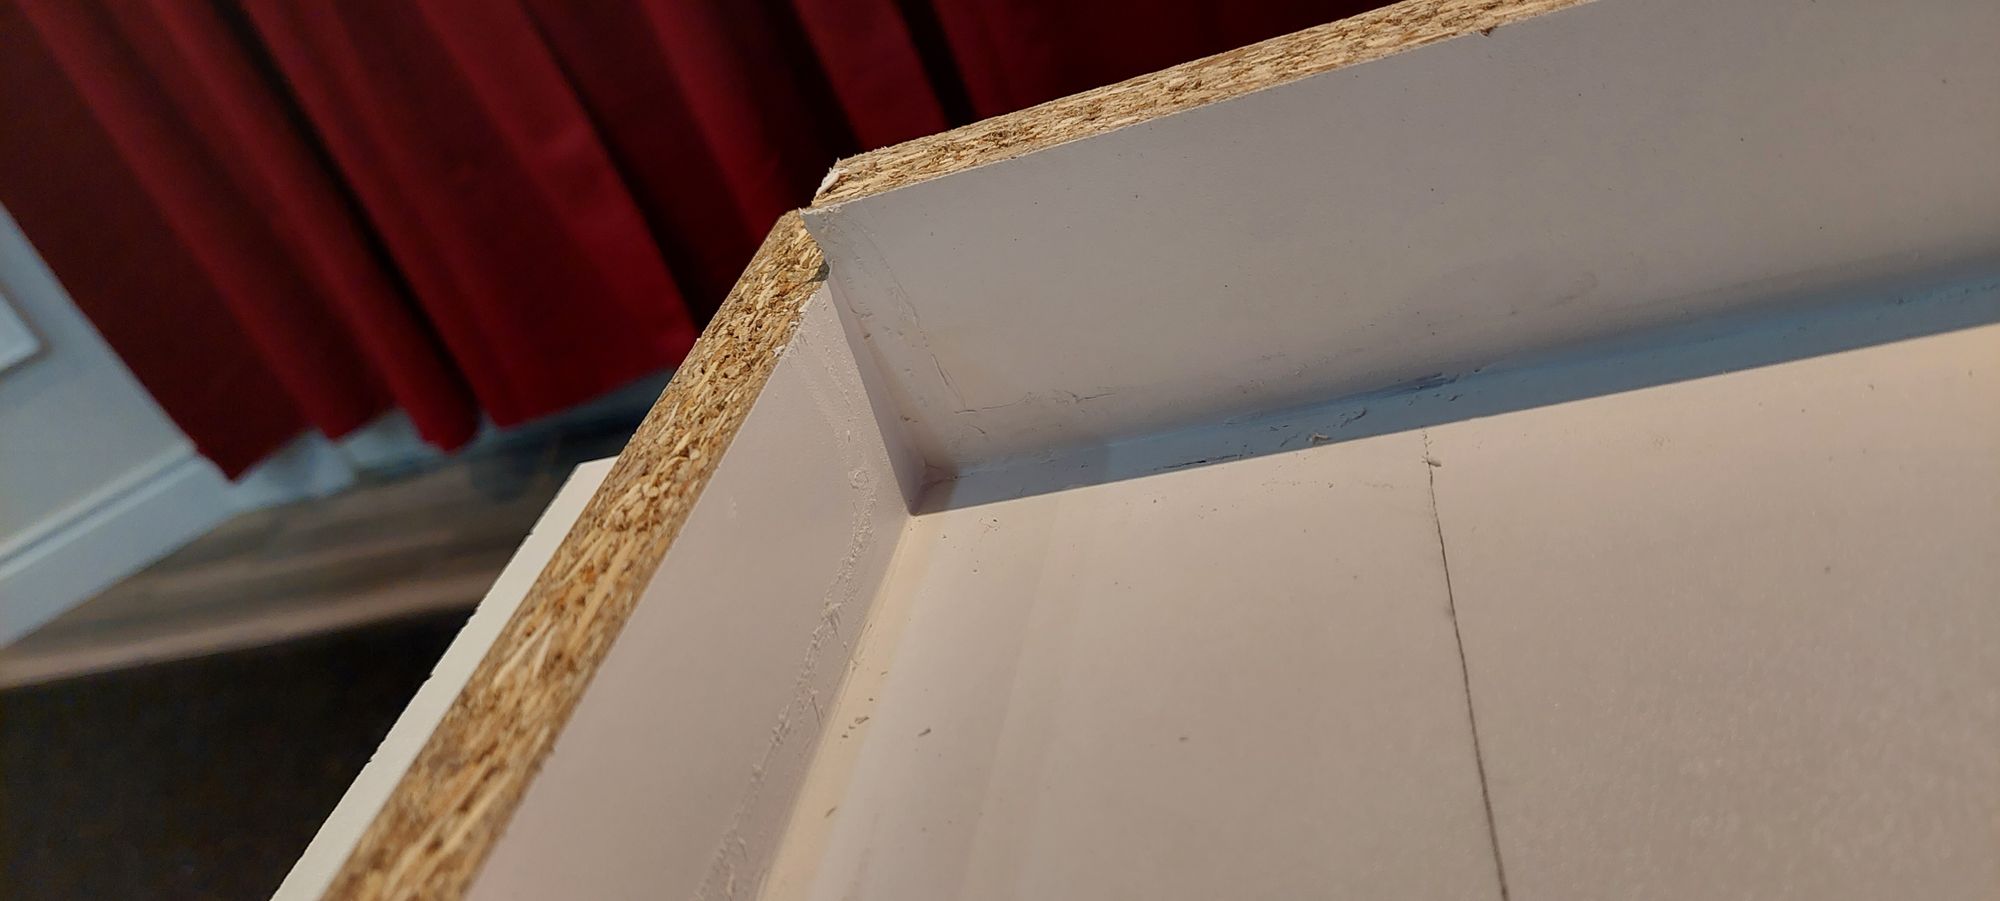
The key part is to have the mold easy to release later, but also leak proof. You don't want anything leaking or you'll have major issues and the mold is not fulfilling its key objectives.
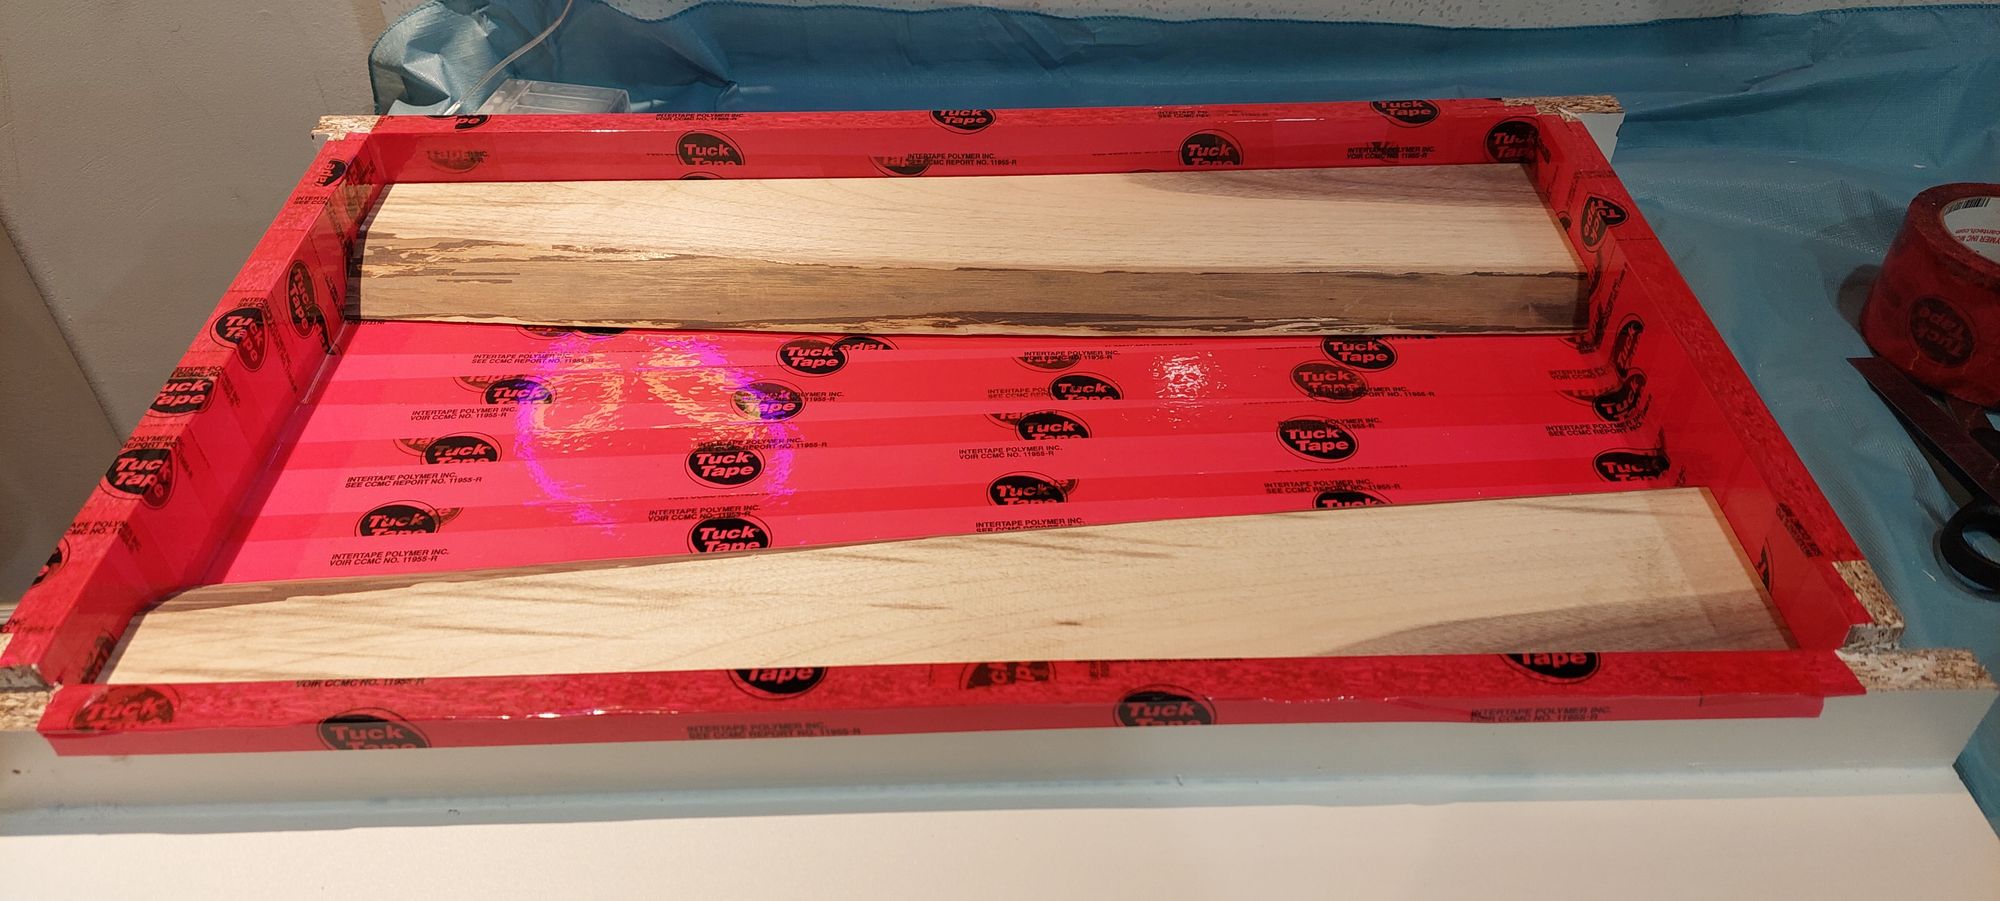
Melamine is used since its a cheap particle board that is smooth surfaced. To make the mold easy to release, use either a mold release spray or Tuck tape. I went the tuck tape route and had a few issues that could easily be improved for future table (will go in details later).
To prevent leaking, use Caulk to stick the side pieces of the Melamine board to the main bottom piece and seal around the edges afterwards as well. Be sure to give it overnight (or 8-24 hours) for the Caulk to fully dry. Even though fast acting Caulk was used, best practice is to still give enough time for drying (Cam mentions having issues with leaking when not giving ample time). Too much Caulk is never a problem. Note that getting the Caulk out is difficult without a Caulk gun. A Caulk gun can be bought for around $10 at a local Canadian Tire and is highly worth the money.
General summary steps to building the mold:
- Have HomeDepot cut to size your mold pieces.
- Tuck tape the individual surfaces/pieces.
- Join the mold together with Caulk.
- Add Caulk to all your interior edges to ensure you're fully leak proof.
- Leave overnight to dry.
- Remove any bark from your wood, insert wood pieces, and move forward on the resin pour steps (next blog).
Here are some pictures of my mold:
Key mistakes to improve from my first mold:
- Tape individual pieces of the mold before joining everything together with Caulk (and screws). It is a nightmare to get around the corners with Tuck tape otherwise. Extremely time consuming and you'll never get the corners done well enough to beat covering with tape on individual pieces.
- Do NOT make the mold too tight relative to your live edge wood pieces. Trim your wood down if you have to. I had the mistake of having my wood extremely tight fit into my mold. The issue I ran into because of this was that I could not push my wood flush to the bottom base of the mold. Even after weighing down the wood pieces with clamps and weight over several nights, it could physically not budge beyound a certain point. This wasted a good amount of resin for me since some resin went under the wood as well and added to my total resin amount. Not only this, but I read/heard that you risk cracking the table top if you have things too tight and don't allow the resin to expand and shrink during the curing process. (Not too sure on the accuracy of this last detail and it may need to be fact checked).
A good video overview of building the mold is part of the Ecopoxy tutorial video. Linking it here as resource: https://www.youtube.com/watch?v=j-LRviQKvGE
Stay tuned for the next post on building the table top!